Knitting With The Games

I didn’t use the “O” word, so I can’t be sued, right?

Anyway, the event that is now know as the Ravellinic Games is starting tonight. Well, technically started this morning at about 8am, but NBC insisted on not live streaming. So I’m using the start of the opening ceremonies telecast. Which I am watching as I type that. I could be a professional procrastinator, if such a thing could actually exist.

I didn’t join a team. I’m a procrastinator, remember? I just decided to do this…a week ago? I’m not really sure. But it wasn’t the months ago that everyone else started. That’s the important thing to remember. Actually, I kind of kept forgetting that there were even going to be “games” this year. I will be disappointed if someone doesn’t try to push the potato-man logo Bart created in the 2010 “games” episode, though.

Since I’m not actually participating in the Ravellinic Games, I’m going to use Yarn Harlot’s rules she created in 2006.

“Rules:
1. The project must be a challenge for you to complete in 16 days.
2. There are no rules about what a challenge would be. Like the real Olympics, there are many areas to compete in. If you are a new knitter, then a garter stitch baby sweater might do…If you are experienced, well. I’ve already considered Torino. Use your own conscience.
3. While this is intended to be somewhat difficult (like the Olympics) it is not intended to ruin your life. Don’t set yourself up for failure. (Olympic athletes may cry, but they do not whine pitifully, sob and threaten members of their family with pointed sticks because they haven’t slept in five days. ) This is intended to (like the Olympics) require some measure of sacrifice, and be difficult, but it should be possible to attain.
4. No casting on before the flame is lit.
5. Finish before the flame goes out.
6. You may swatch before the games. (I consider this “training.”)”

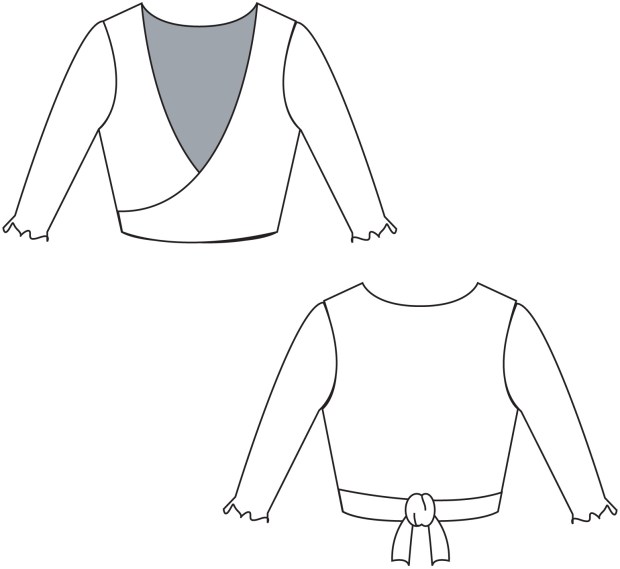
With those rules in mind, I’m setting off to create this wrap sweater (and perhaps the leggings, if I have enough yarn left). As part of my “training”, I sketched out the sweater:

so I could try out the color combination I am planning:

And, yes, that really is the yarn in there, from a scan of my swatch:

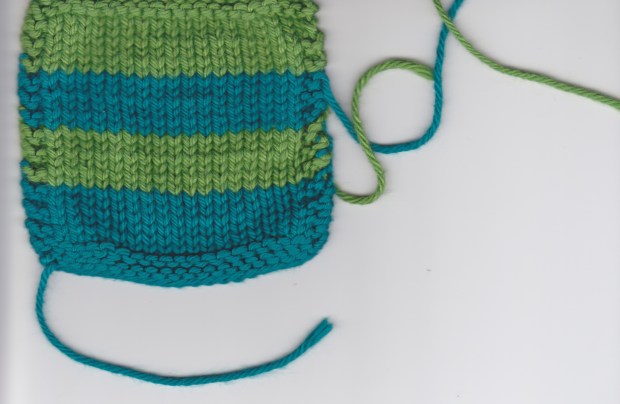
so it’s as close to what it will look like as possible.

Now all I have to do is actually cast on while I’m watching the rest of these opening ceremonies. I’m also machine sewing the seams and planning to knit the sleeves in to save myself all that hand-sewing. If you want to keep up with my progress, I’m going to update the Ravelry Project Page daily.

Quick DIY: Patch Your Skinny Jeans

Everyone has that one pair of favorite, worn-in skinny jeans. Unfortunately, those are usually the ones that get torn up beyond “fashionably distressed.” That is where my pair ended up a few weeks ago, with the left leg ripped halfway from the knee to the ankle.

The main problem was the high spandex content in my jeans. The rip happened from my knee poking through the original hole, so I didn’t want to patch it with something stiff. I was fairly certain I had seen spandex/cotton patches at the store. Apparently, that was something I imagined.

For those of you in the same situation, I’ll give you a simple solution. Go to the thrift store and find a cheap pair of jeans with the same fiber content. That’s the most important part. Seriously, you need to check the tag in your jeans, right down the exact percentages of fiber, and then search through your store for a pair that is the same. You want it to stretch the same amount.

Your next step will be to find a part of the thrift store jeans that are in tact and the same width as the area you wish to patch. I had a pair of jeans about three sizes smaller, but with a slightly flared leg that worked perfectly below the knee to reach slightly longer than seam to seam.

Flip your jeans inside out and lay your patch on the space you need to cover, wrong side facing up (like above). I wanted to leave the original hole open, so I set it just at the edge. Sew the vertical edges of the patch to the seams of your jeans, then flip them inside out again.

Starting from the top, use an elastic stitch (it usually looks like a dotted zig-zag stitch on your machine) to create horizontal lines about 1-1.5 inches apart. It also helps to start and end each line with a few straight stitches (and backstitch them).

Try to match your thread as much as you can. The elastic stitch helps to hide it a bit, too. Or, you could always use a very different color of thread to make the patch a design element. Another tip, you don’t have to sew directly along the top or bottom edges. Your first and last lines will hold the piece in place well enough, along with it being stitched along the edges, that it won’t fold over when you put your pants on.

Two-Eyed Minion

Most of my minions tend to have only one eye, but by request my second minion hat has two eyes. The requester? requestee? person who made the request had received a one-eyed minion hat and had gotten his grandmother hooked on “Minion Rush” over Hanukkah, so he asked that I make a two-eyed minion hat for her.

I don’t know. For some reason minion-y things don’t look so minion-y with two eyes.

I had the crown of a hat already knit that I was wondering how I would use from re-knitting the first hat. So when he mentioned I should make one for “Grammy”, I was already halfway done. Well, a third of the way done anyway.

Project notes, as always, can be found on the Ravelry project page, but in general I used Knit Picks Comfy worsted weight yarn in Creme Brulee, White, Celestial, and Hawk, along with a miniscule amount of Knit Picks Stroll in Midnight for the pompom. The eyes are basic crochet circles with buttons sewn in the center for pupils.