A Carry-Some

I’ve created a long list of projects for myself recently. In order to get everything done in a reasonable amount of time, I’ve started carrying some socks I’m working on with me nearly everywhere. Seriously. I was knitting and walking around downtown Burbank the other day wasting time before I had to go back to work.

Anyway, there is no room in my purse to continuously shove the socks, needles, stitch markers, and information card I need to work on the socks at any spare moment. So I needed a way to contain everything and attach it to my bag (or carry it on its own). Luckily, I had a free workshop on Craftsy to make a small drawstring bag. I also had the remnants of some “fat quarters” (a half-yard of fabric cut along the fold) lying around.

The bag came out just the perfect size for all the things I needed to carry to work on the socks I’m currently making.

Plus, the drawstrings let me either tie it to the strap of my big bag or carry it on its own. I even tied it to my belt loop the other day while I was walking.

Make It a Bat Cycle

Remember how I told you there was a part 2 to the birthday gift from Monday?, and also how I procrastinated on it even more than the bubbles?

See, his big gift this year was his first ever bicycle. But that is a thing that is most definitely going to outlast his Batman phase and most likely be handed down to his brother. So he got a bike with flames on it but, through a series of random circumstances saw a picture of it and said he would rather have a Batman bike. Ding ding, birthday gift idea!

I had intended to measure the seat of his new bike (which he didn’t know he was getting yet) and all of that the day before his party so I could make a seat cover to give him the next day, but I never got around to it between laundry and lunchtime for baby brother. Luckily, I was set to stay with brother as he napped the next morning and everyone did things to get ready for the party. After everyone left I snuck in to where the bike was hidden, grabbed quick measurements and settled in at the dining room table to cut and sew a seat cover out of felt.

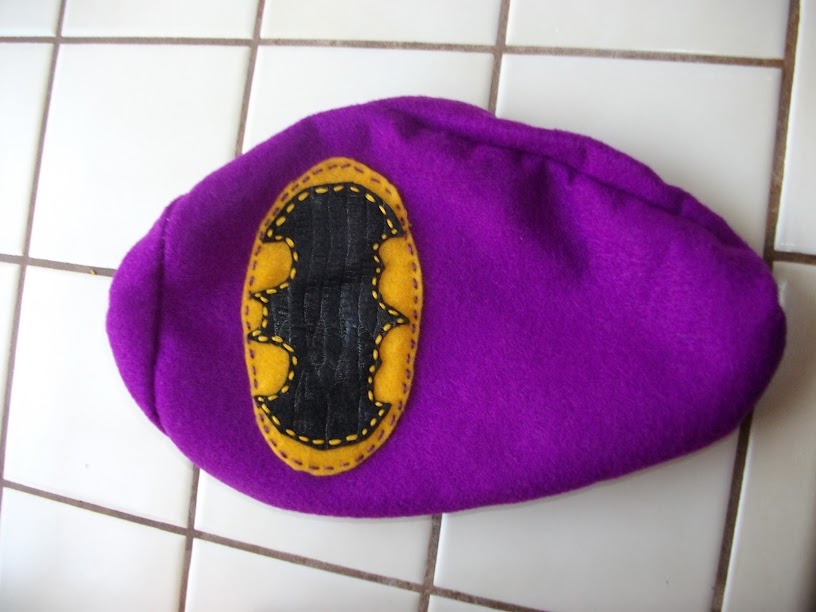
I had made the decal the night before, since that didn’t have to be any particular size. Then I cut out the four pieces of the seat, stitched the decal to the top, and backstitched them all together with embroidery thread to make the seams as secure as possible when hand sewing. I added a pullstring at the bottom so the cover just slips on the seat and is then secured with the string. Baby brother helped out by taking an insanely long nap and waking up just in time for us to walk down to the party and get cake.

It was a hit. He apparently wanted it put on his bike immediately and was incredibly excited about it. Mom was thrilled that he had his own logo on the bubble bottles. (And, let’s face it, at this age handmade gifts are more for mom than for child.) All around a successful birthday gift set.

How badly do you procrastinate on making things for others? Or am I the only one? Are you one of those super organized people who thinks months ahead about gifts and keeps them in a closet until the gift-giving occasion arrives?

Tat It Up

On my winter vacation, I learned how to tat. Alright, so this isn’t the “What I did on my vacation” essay we all had to do ad nauseum in school because the teachers didn’t really want to be back any more than we did. But it is true that I sat on the couch for a few hours in between my knitting and reading to learn how to tat. And now I can, thanks to Tatted Treasures. She is even so kind as to include left-handed instructions. Which is good because I tried to learn the right-handed way and failed miserably.

After a few “doodles”, small pieces made with short bits of string, this bracelet is my first real project:

Tatted bracelet

It’s called the Tatted Corsage Bracelet because it resembles a corsage. It’s made up of four pieces (the flower, two ends, and the body) and it closes with a hook and eye.

Bracelet flat

The instructions are for needle tatting, but I made it with a shuttle instead. It’s all the same stitches, so it’s very easy to make them either way, even if I missed a loop on that left side.