The Best Laid Plans

I know better than to say I’m going to get something done quickly. Or I should, by now, anyway. No more than an hour after I posted about needing to finish the gift I was knitting, it looked like this:

No, I didn’t turn it into a hedgehog instead. I frogged it. For those unfamiliar with the term, I ripped it out. All of it. Well, all except the head. That I went back to and closed up at the bottom with a ridge of purl bumps for attaching it to the “body” later.

The original body was nice and square at the top, but the bottom half got very elongated and not so pretty. So I tried again, this time aiming to knit the body as two separate squares with the “tummy patches” created by a color-work circle in the middle. That didn’t work out so well, either. Finally, I came up with crocheting the center circle and knitting the outer edge around.

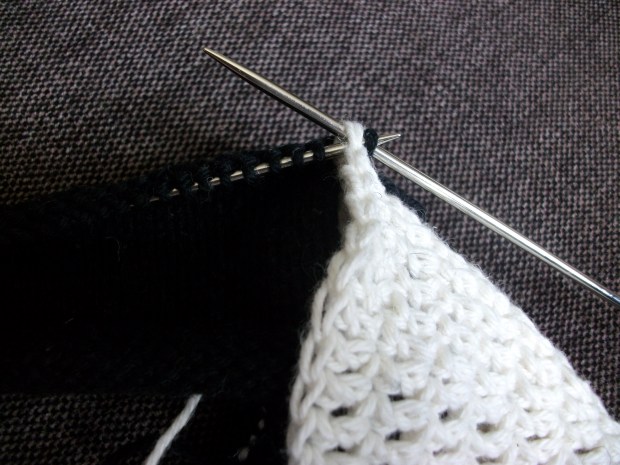
Ok, first I tried to crochet the whole thing from the center, but turning the circle into a square without adding giant holes at the corner didn’t seem like it was going to happen. I made the front and back, color-reversed squares separately and then sewed them together with a blanket stitch and whip stitched the head in place:

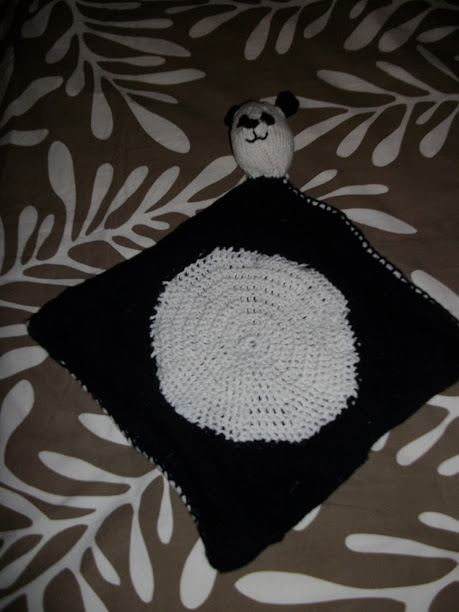
After the party, of course. But, being a party for a 1-year-old, presents didn’t get opened until the next day so I snuck it in the bag right before it was opened.

Pretty Little Butterfly (A Review)

I had seen a bit about needle felting before, but this video from Bubzbeauty got me really interested. (In fact, I think her Totoro design is going to be the first 3D piece I try next.) I was wandering the aisles of Michael’s with a 50% off coupon one day and saw the Dimensions Feltworks Butterfly “learn needle felting kit”.

The kit comes with pre-printed felt, two colors of roving (unspun wool), yarn and embroidery thread, felting and embroidery needles. The first thing I would suggest is to get something better than the foam block included with the kit to felt on. The foam deflates very quickly, especially as much as you have to stab the needle into the felt to get it to hold. You can buy a special “felting mat”, but I went with a plastic-bristled scrub brush from the cleaning supplies aisle at Target.

The felting instructions are really easy to understand, as are the instructions on how to create the butterfly and use the finished butterfly. The embroidery instructions may be a little difficult to understand if you have never done embroidery before, but there are always great instruction videos on YouTube. All in all, this is a great little kit to get started felting, and a great project for beginning felters. Plus, it’s an adorable butterfly. What more convincing do you need?

Another thing, besides the felting mat I mentioned before, that might make it easier to learn is the Clover Pen-Style Felting Tool. You can use 1, 2, or 3 needles at a time, and it extends to two different lengths. Let me tell you, three needles at a time makes the whole process go a lot faster, at least when you are working flat.

Light and Breezy

I love layering. So much so that I have a drawer’s worth of plain colored t-shirts and tank tops that exist solely to be worn underneath other shirts or vests. I mean, I could wear them by themselves, but that would be boring.

One thing my dresser has been missing for a while in the layering department is what I like to call a “mesh shirt.” I’m sure it has another name, but I am too lazy to actually look it up. I had one for a long time that was pastel tie-dye, but it had a few holes that were bigger than they should be because they got snagged or torn in the wash.

Browsing for projects (because I never have enough projects lined up, right?) I came across the Breezy T pattern by Brenda Bourg on the Red Heart website. It was so perfect I even matched the color of the sample.

It turned out extremely well. This was my first attempt at crocheting a garment. Many hats before, and a couple of arm bands, but never a shirt. That kind of thing I tend to reserve for knitting. Because (for those who don’t know) knitted fabric tends to have more drape and be more suited for clothing than stiffer, crocheted fabric.

Because of the mesh structure, though, this shirt is quite nice and soft. The one thing I changed from the pattern was the sleeve edging. What was written does not seem like the edging in the sample picture, plus it was way too wavy. Instead I used a simple edging that would give me a similar shape to the picture (details here if you want to know, along with all details for the project).

This may become my favorite layering piece of the summer if the temperatures stay where they are. Turn a tank top into a work-appropriate look without making me feel like I’m boiling in my skin when we are outside.