Crayon Holder!

You have no idea how long I’ve wanted to make one of these things. It’s just never seemed very practical seeing as most packs of crayons have at least 16 and that is a lot of little slots and a long roll to lug around. But these are dry erase crayons that only come in eight colors, making it actually practical and necessary.

I even included space for the cleaning cloth and the crayon sharpener. Much neater than the plastic bag everything was just thrown in before. Plus, I labeled it so it won’t get confused with all the non-existent crayon holders.

(Sorry for the blurriness. I could’ve sworn that was in focus when I took the picture.)

I used some of the leftover fabric from the bicycle I refurbished a few weeks ago, some elastic, and some buttons I had taken off a pair of shorts that had to be retired to the trash can when they ripped to pieces. The words are just written in my trusty chalkboard markers, with a few layers to make it actually stand out.

Quick DIY: Mini Heart Pillows

One would think it would be impossible to forget a holiday that is advertised everywhere for the month and a half leading up to it, but one would be wrong. That is how I found myself desperately making four Valentine’s at 8:00pm Thursday night. At first I attempted to knit some little heart pillows. I found the perfect tutorial and had set about on the knitting, when I looked at the clock, realized it was 9:00pm now, and saw that I was only about a quarter of the way through Valentine #1.

Change of plans, and quick. I don’t have much in the way of craft supplies just lying around. Sure, I could draw up some cards in no time, but these are for little people who are pre-reading and would really rather have something tangible. So I dug through my meager closet stash and found a piece of purple, a piece of yellow, and a large piece of green felt in my “leftovers” basket.

With just the felt, a pair of scissors, some embroidery thread, and a minuscule amount of supplemental yarn to add to the padding, I managed to whip up some cute little love pillows.

Mini Heart Pillow DIY

Materials

  • Colored Craft Felt
  • Scissors
  • Embroidery Thread
  • Stuffing (can use fiber fill, left-over fabric/yarn, basically whatever you have on hand to fill the pillow with)

Instructions

  1. Cut two matching heart shapes from the felt. This can either be done with a template you create on paper or, my favorite method, by folding the felt in half while cutting to keep the hearts as close to each other in shape as possible.
  2. Using all six strands of embroidery thread (to make it stand out; use less if you want a more subtle effect), back-stitch the name of the recipient or your desired message onto one of the felt hearts. This tutorial from wikiHow can help if you have never done a back-stitch before. Note- I don’t knot my thread, i just leave a bit hanging at the beginning of my work on the wrong side of the fabric.
  3. Holding both hearts wrong sides together, take all six strands of thread and a running stitch around the edges to hold the pieces together. Be sure to stuff it as you go so you aren’t trying to push a whole pillow’s-worth of stuffing through a tiny hole at the end.
  4. Bring the end of your thread through the middle of the pillow, putting the needle in between the felt pieces at the edge and taking it out the same way at the opposite edge and cut the thread close to the pillow.

And that is it. You have a nice little gift to show your love and appreciation of a loved one in a very short amount of time. I think each of these took me around ten minutes from start to finish. It may take you more or less time depending on how proficient you are at sewing and embroidery, of course.

What kinds of gifts did you give for Valentine’s day?

Quick DIY: Patch Your Skinny Jeans

Everyone has that one pair of favorite, worn-in skinny jeans. Unfortunately, those are usually the ones that get torn up beyond “fashionably distressed.” That is where my pair ended up a few weeks ago, with the left leg ripped halfway from the knee to the ankle.

The main problem was the high spandex content in my jeans. The rip happened from my knee poking through the original hole, so I didn’t want to patch it with something stiff. I was fairly certain I had seen spandex/cotton patches at the store. Apparently, that was something I imagined.

For those of you in the same situation, I’ll give you a simple solution. Go to the thrift store and find a cheap pair of jeans with the same fiber content. That’s the most important part. Seriously, you need to check the tag in your jeans, right down the exact percentages of fiber, and then search through your store for a pair that is the same. You want it to stretch the same amount.

Your next step will be to find a part of the thrift store jeans that are in tact and the same width as the area you wish to patch. I had a pair of jeans about three sizes smaller, but with a slightly flared leg that worked perfectly below the knee to reach slightly longer than seam to seam.

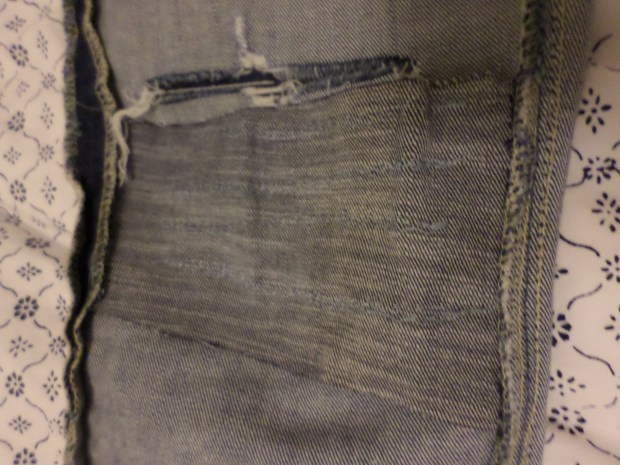
Flip your jeans inside out and lay your patch on the space you need to cover, wrong side facing up (like above). I wanted to leave the original hole open, so I set it just at the edge. Sew the vertical edges of the patch to the seams of your jeans, then flip them inside out again.

Starting from the top, use an elastic stitch (it usually looks like a dotted zig-zag stitch on your machine) to create horizontal lines about 1-1.5 inches apart. It also helps to start and end each line with a few straight stitches (and backstitch them).

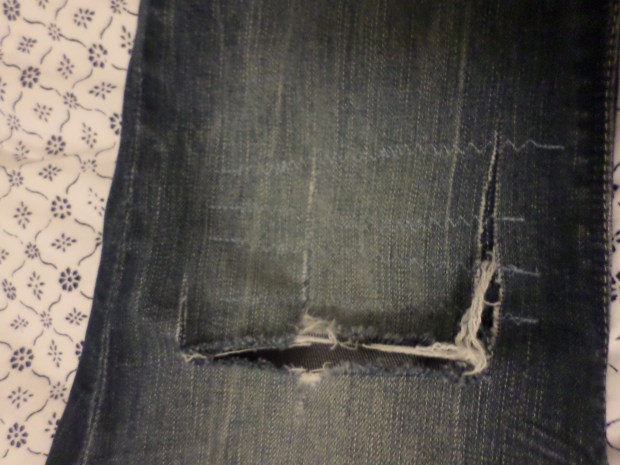
Try to match your thread as much as you can. The elastic stitch helps to hide it a bit, too. Or, you could always use a very different color of thread to make the patch a design element. Another tip, you don’t have to sew directly along the top or bottom edges. Your first and last lines will hold the piece in place well enough, along with it being stitched along the edges, that it won’t fold over when you put your pants on.