Finished Object – Amigurumi Batly from Eureeka’s Castle

A few weeks ago, the dogs were being real beggy long before dinner time. I told the little one he was going to drive me batty, and then my brain got stuck on an idea.

A crocheted blue character with pink batwing shaped ears, black glasses, white fangs, a purple and black shirt, tan pants, and brown shoes sitting in front of a TV

I had to make an Amigurumi version of Batly from Eureeka’s Castle. I am fairly certain this is the first character I’ve created without a pattern. I usually tend to stick to food when I’m making it myself. So I decided to start with the smallest piece and work my way up from there so I wouldn’t get to that piece and then have to work impossibly tiny.

Tiny blue knitted tubes on gray knitting needles

That smallest piece happens to be the finger. After a few failed attempts to create them with a crochet hook, I decided I would just make teeny i-cord niblets my smallest double pointed needles.

Small blue crocheted hands sticking out of black crocheted sleeves

I then attached them with crochet stitches, offsetting the thumbs by a couple rows to give him the correct handshape. I finished the hands off and then worked the sleeve around the wrist and up the arm, creating a bit of a raglan top to the sleeve by ending them in a triangle. I stuffed those sleeves with yarn scraps because they were too narrow to really fill with polyfil.

Two crocheted brown pointed lump shapes

I then made roughly teardrop/ Hershey kiss-shaped shoes about the same size as the hands and stuffed them with scrap yarn as well.

A pair of arms with blue hands sticking out of sleeves and a pair of pants with brown shoes sticking out.

I made his pants bottom up in the same manner, giving them a cuff at the bottom with a row of double crochet stitches and attach gin them at the top. The pants I stuffed with a handful of pipe cleaners that will be important later.

The purple torso now connects the arms and pants

I gave him a proportional torso in purple because the puppet wears a two-tone track jacket, but I wanted to make it a little easier on myself at this point so I just made it a single piece. This part was the first bit I stuffed with polyfil.

The character with a finished head with a slightly open mouth, pink tongue, white fangs, black nose, and slightly buggy eyes

I worked the head from the bottom up. Everything seemed to be going ok up the chin. I made the inset for the mouth and the eyes based on a combination of what would fit the head and the smallest I could go. Things started going south, and ignored it and pressed on. I even made the ears and sewed everything together. But this head was entirely too small.

The body of the character with a pile of facial features next to it on a gray chair

I had to frog the head, and make it bigger. Luckily, I was able to make it to fit both the body and the pieces I had already made. The only piece I had to finish at the very end was the glasses, which I ended up figuring out how to shuttle tat so they would be small enough without completely frustrating me. Then, it was time to test the best part I built into him, considering it’s one of the character’s favorite activities.

Crocheted Batly hanging upside down by his knees from the top of a TV

He hangs upside down, thanks to the pipe cleaners in his legs! I wasn’t entirely sure this was going to work, because he kept getting heavier as I added pieces. But I used enough pipe cleaners that it worked. I am so excited about it that I’ve hung him upside down from one of my shelves instead of sitting him on it.
Follow me on Instagram and Ko-Fi.

Pattern Release – Ski Slope Spirals Beanie

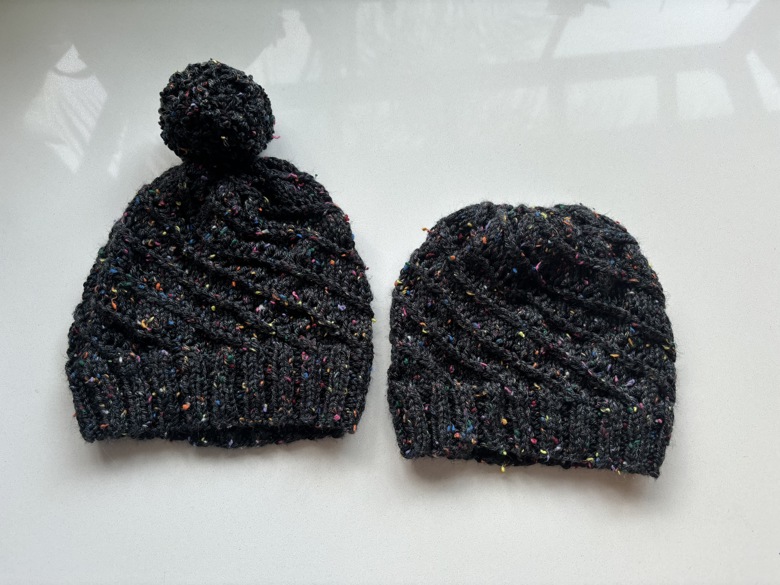
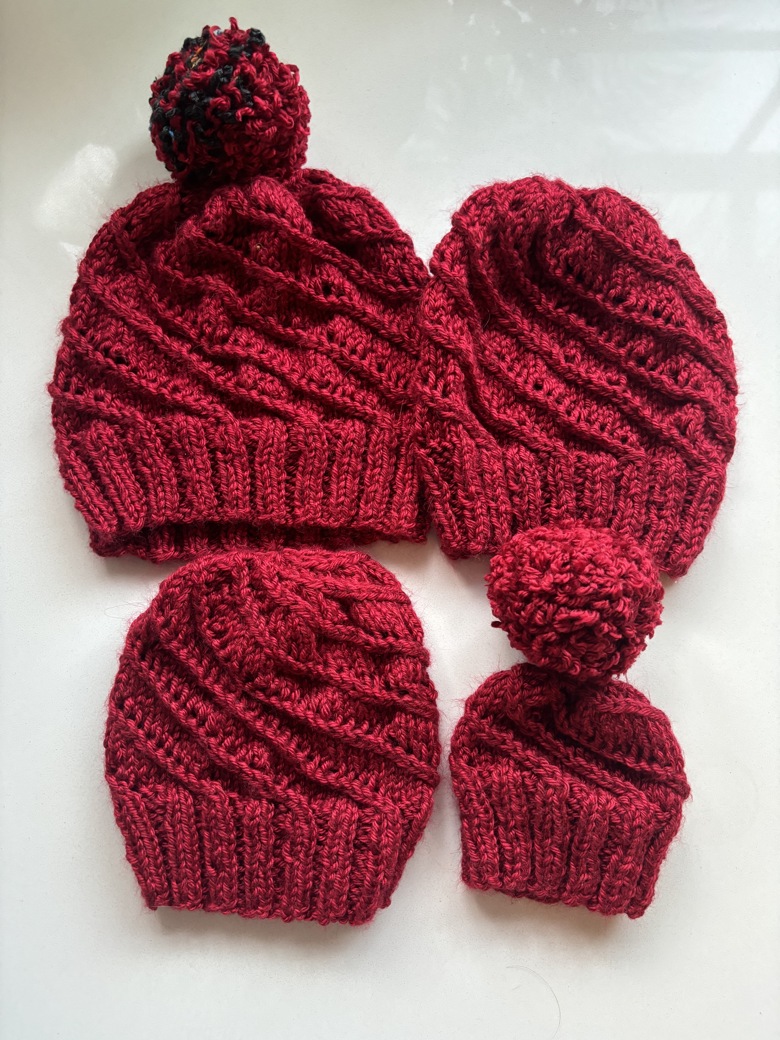
When I was working through some of my yarn stash to make hats this fall, I started coming up with this textured spiral pattern. 

Then I found a couple sample blankets that I never got around to listing for sale and decided to continue developing the pattern with yarn I reclaimed from those samples.

And now, the pattern is finished and releasing on all my platforms (Ko-Fi ShopRibblrLoveCrafts, and Ravelry) so you can grab it on whichever platform you prefer.

And now for the description:

A simple pattern of yarn overs and slip-slip-knit decreases spiraling up the body of this hat gives a wonderfully stretchy texture that looks super cute with or without a pompom attached. Made with less than a full ball of Lion Brand Heartland yarn, this hat comes together super quickly, making it great for last-minute gifting or a relaxing weekend project.

Skill Leve: Intermediate. Stitches and techniques used: knit, purl, yarn over, slip-slip-knit, knit 2 together, and moving stitches.

Materials:

Yarn: 23 ( 32, 45, 61) [70, 82, 99] grams of Lion Brand Heartland Yarn (142g / 251yds per ball)

Needles: Size 9 circular and/or double-pointed needles (depending on preference for working in the round at a small circumference)

Yarn needle

Scissors

Tape Measure

Optional: Pompom in matching or contrasting color for the top

Choose size based on head circumference, labeled in parenthesis. Size up for a looser fit, and you can size down for a tighter fit. My head is 22 inches around and I can comfortably wear the child size through adult large.

Flat measurements at widest/tallest point:

Newborn (12 inches):  5 inches / 6 inches

Infant (14 inches): 6 inches / 7 inches

Toddler (16 inches): 7 inches / 8 inches

Child (18 inches): 8 inches / 9 inches

Adult Small (20 inches): 9 inches / 9 inches

Adult Medium (22 inches): 10 inches / 10 inches

Adult Large (24 inches): 11 inches / 11 inches

Finished Object – Roblox Pillow

(Note: I swear I published this back in September of last year, but it was still in my drafts folder and the link lead nowhere when I pasted it into a private window, so here it is. Originally written to be posted September 12, 2022)

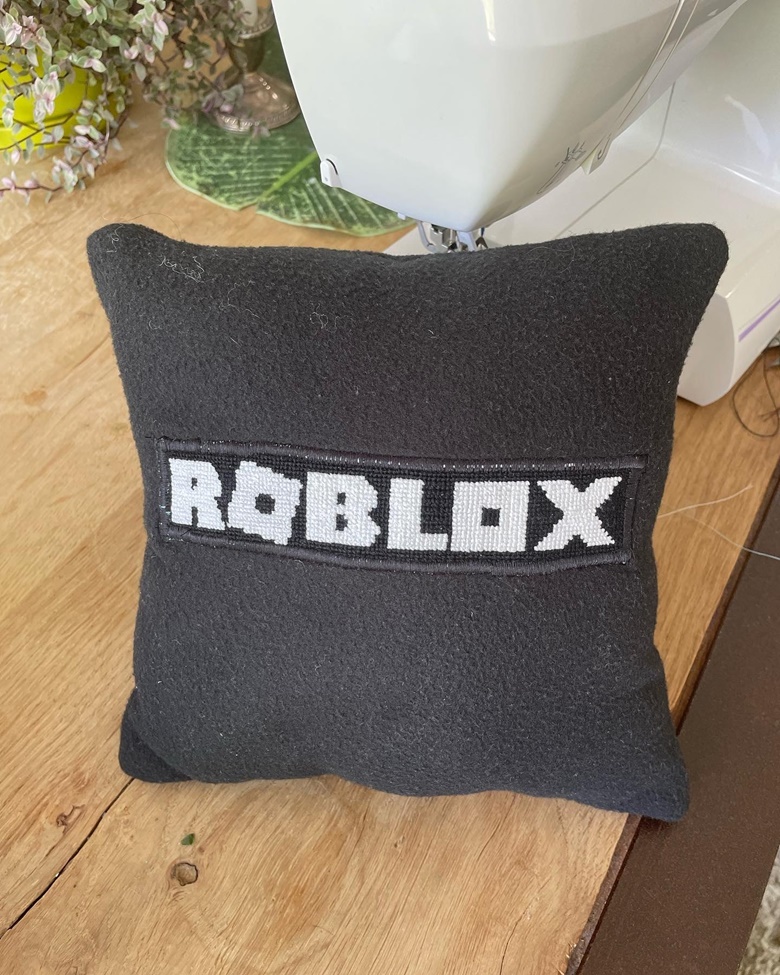
The littlest turned 10 a couple of weeks ago and had a simple request – a Roblox pillow with the logo on a black background.

Friends, they do not make Roblox pillows at all, so it was time to make one. At first, I was going to cross-stitch the name on one side and the logo on the other. Never mind the fact that I was starting this less than a week before his birthday.

I showed him one of my cross-stitched pillows as an example to make sure it was what he wanted, and he said it was, or it could be a soft pillow like his favored pillow he won at a carnival game at a theme park this summer. That would be much easier than cross-stitching two whole sides of a pillow anyway.

My original thought was to punch needle the logo side so it would be soft, but I didn’t actually have the appropriate fabric, and what I had that I thought would work did not. In the end, I ran up to JoAnns, bought an 8th yard each of black and white fleece, and appliqued it together using my sewing machine on the zigzag setting on the shortest stitch length.

I was also originally going to cross-stitch the entire back and line it with the fleece, but I messed up the colors (don’t color match after dark, friends) and had to start over when I was almost done with the lettering, so I abandoned that idea as well and just did enough of a border to be able to also applique that piece to the black felt.

Sewed everything together inside out, turned it right way around, stuffed it with pillow fluff and the scrap threads, and managed to give it to him the day after his birthday. Bonus points, it turned out the exact perfect size for the little dog’s head, so he lays on it every time he hops on the bed and it is adorable.