Clothespin Mess

That’s what I had on my hands after using my new clothespins for the first time. They had been packed so nice and neatly in their plastic tray, and then I just didn’t feel like trying to stack them all back up.

Easiest solution? Throw them in a bag. Only problem was, I didn’t have a bag like that lying around. So I made one.

Basic instructions (I didn’t write down anything as I was doing it, so very minimal instructions) are on the Ravelry project page. It has a drawstring closure

and sits pretty well when it is full.

It was actually a pretty easy project to figure out in an afternoon, so hopefully my vague instructions aren’t too confusing.

Bathroom Caddies

I have a lot of toiletries. Lotions, toners, toothpastes, etc. And I use something different at night than in the morning. Sharing a bathroom with a little one who still puts everything from the floor directly into his mouth, I can’t exactly leave these things in the cabinets because that would put them directly at his level and I’d find him drinking lotion at some point, I’m sure.

That lead me to the solution of keeping everything on a shelf in my closet out of reach of tiny hands. But, I needed an easier way to transport everything back and forth without dropping something in the hallway and waking little bear up right after he goes to sleep.

Tada! Bathroom caddies. Nesting bathroom caddies, in fact. See, I started with a nice little roll for my toothbrush, toothpaste, and flosser:

Created a slightly large holder with handle for my facewashing things for the morning:

Then made a rectangular box with handles at each side to hold everything together:

Now I just take out the parts I need and have a handy little way to carry it all back and forth. The morning one worked really well today. Plus, they hold all my stuff on the shelf very nicely, even when it refuses to stand up.

Pretty Little Butterfly (A Review)

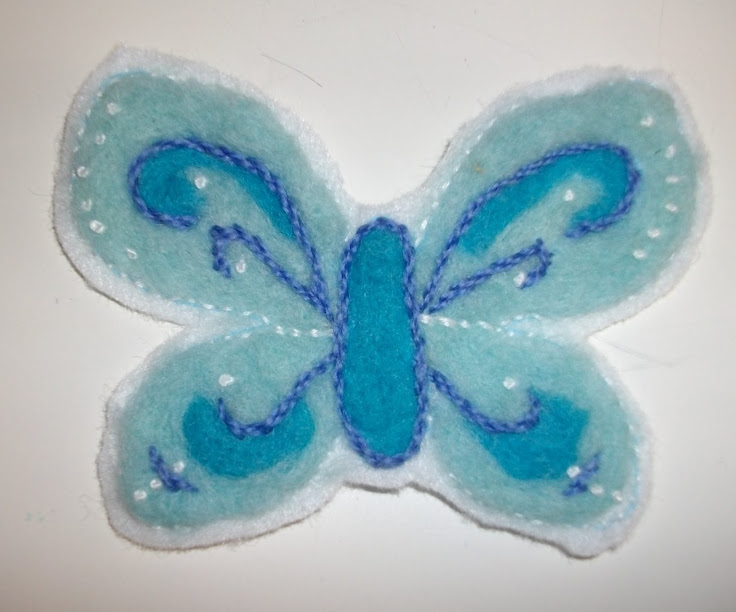
I had seen a bit about needle felting before, but this video from Bubzbeauty got me really interested. (In fact, I think her Totoro design is going to be the first 3D piece I try next.) I was wandering the aisles of Michael’s with a 50% off coupon one day and saw the Dimensions Feltworks Butterfly “learn needle felting kit”.

The kit comes with pre-printed felt, two colors of roving (unspun wool), yarn and embroidery thread, felting and embroidery needles. The first thing I would suggest is to get something better than the foam block included with the kit to felt on. The foam deflates very quickly, especially as much as you have to stab the needle into the felt to get it to hold. You can buy a special “felting mat”, but I went with a plastic-bristled scrub brush from the cleaning supplies aisle at Target.

The felting instructions are really easy to understand, as are the instructions on how to create the butterfly and use the finished butterfly. The embroidery instructions may be a little difficult to understand if you have never done embroidery before, but there are always great instruction videos on YouTube. All in all, this is a great little kit to get started felting, and a great project for beginning felters. Plus, it’s an adorable butterfly. What more convincing do you need?

Another thing, besides the felting mat I mentioned before, that might make it easier to learn is the Clover Pen-Style Felting Tool. You can use 1, 2, or 3 needles at a time, and it extends to two different lengths. Let me tell you, three needles at a time makes the whole process go a lot faster, at least when you are working flat.