And I mean trashy in the best way possible. As in a trash truck shaped cake for a trash truck obsessed two-year-old. Before we jump in, perhaps I shall explain what I mean by a semi-tutorial. Basically, it’s my way of telling the story of how I baked this cake in a way that maybe helps you avoid any mistakes I made along the way, or at least let’s you point and laugh at me. I used two easily available recipes for this project: Hershey’s Old Fashioned Chocolate Cake Recipe and Best White Icing Ever Recipe. I’ll make a note of any changes as I go along.
First, let’s bake the cake, as I did on Saturday afternoon.
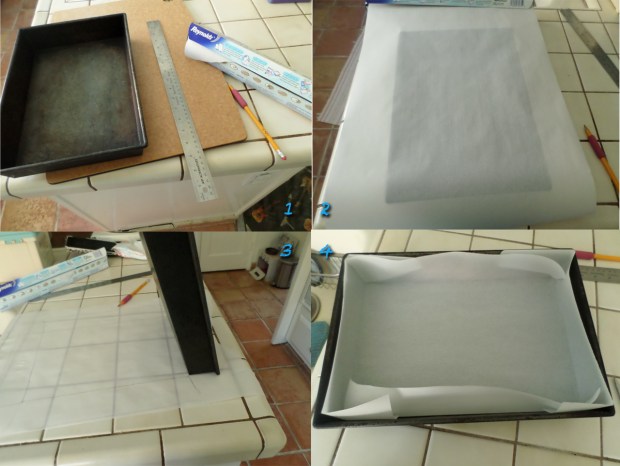
You have to start by prepping the pan. Since I was making two sheet cakes and only had one 9×13 inch pan, I used parchment paper to make liners so i could just switch from one cake to the other without having to clean the pan in between. Plus, it helps the cake come out easier.
Detailed Steps:
- Grab a pencil, your pan, some parchment paper, and a ruler if you want to be more precise. I had intended to actually measure things, and then just decided it was easier to trace the whole thing and shove the results in the pan.
- Tear off a piece of parchment paper large enough to cover your pan with at least two inches overlap on each side (considering the pan is usually 9x13x2 inches).
- Trace (or draw with your ruler) the bottom and sides of the pan as if you were peeling the pan apart at the edges.
- When you cut the paper out, don’t cut off the tabs created on the short ends. Instead, use them to wrap around so there won’t be any holes for cake batter to seep into the pan.
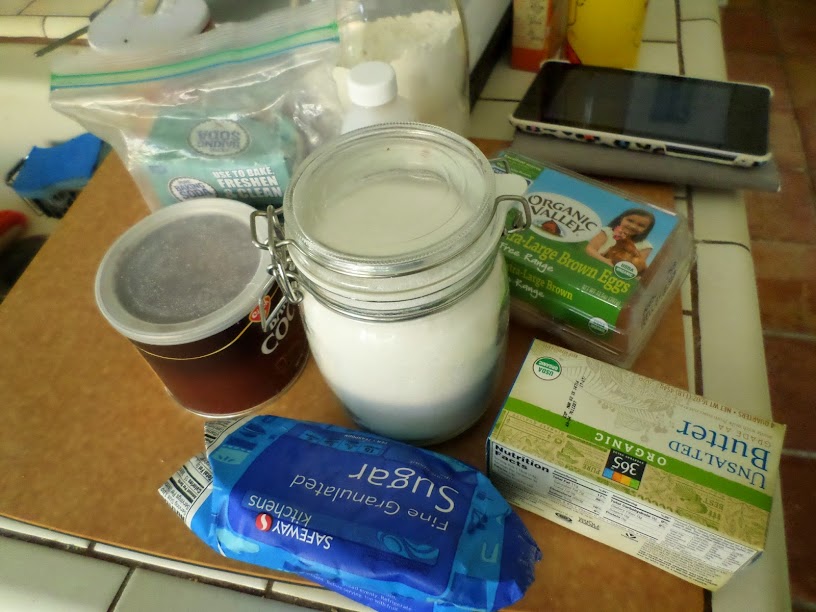
Once you have your pan ready, preheat the oven and grab your ingredients. This is the place where I differed from the cake recipe. Rather than peppermint, I just used dark chocolate chunks. But otherwise I kept all the ingredients the same.

Start by stirring your “wet” ingredients together: the butter, sugar, eggs, and vanilla. While that is stirring in the mixer, you can move on to the dry ingredients which I always like to put through the sifter.

You could also just stir them in a bowl with a whisk, but that is less fun. Now it’s time to add the dry ingredients into the mixing bowl that has now been running way longer than the three minutes or so the recipe suggested, alternating with the water. Don’t worry about my cloudy water in that picture. The measuring cup I was using did not have 1 1/3 marked so I filled it to 1 and added 1/3 using the same cup as I had used to measure the cocoa powder. We don’t have cloudy water coming out of the pipes.

Once you have that all stirred together and you stir in the chocolate chunks that have been forgotten in the window and are starting to get quite soft, it’s time to pour the batter into the pan, wash all the dishes, and start over again to make the batter for the next cake while it bakes. Then you can let both cakes cool on the counter, continually checking over you shoulder to make sure the dog doesn’t jump up and decide to eat them, all afternoon while you feed, clean, and play with the soon-to-be-birthday-boy who has no idea why he smells cake but doesn’t get to eat any.
Now that we have the cakes ready, we can decorate them. And by that I mean combine them into one and decorate it. But I will save that for tomorrow since this is getting incredibly long.
